For our POS integrated venues, please kindly create new, or make adjustments to your current items and prices within your POS first, then proceed to run an import into the backend of HungryHungry to bring your newly created, and/or updated items over to HungryHungry.
For our non-POS integrated (standalone) venues, please follow the below steps.
In the backend of HungryHungry navigate to Manage Menu > Items > Create New Item
Step by Step
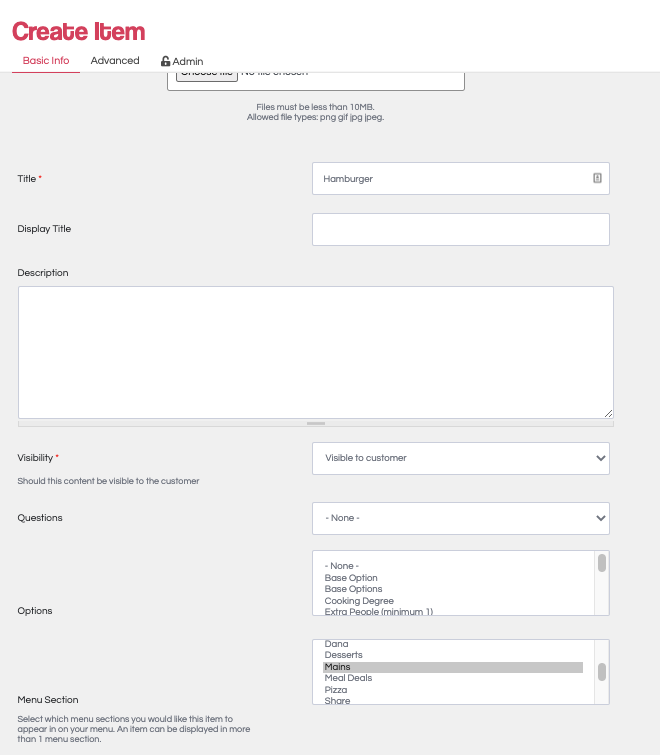
The first step to creating your item is by entering in the Title and selecting its Menu Section only, then hitting SAVE (top right of the screen). This will then reload the item with all the customisable options such as pricing, option groups, additions and minuses.
Once you have hit save. You will notice that the layout of the item creator has changed. Here is a breakdown of what you can adjust in each tab.
Basic Info
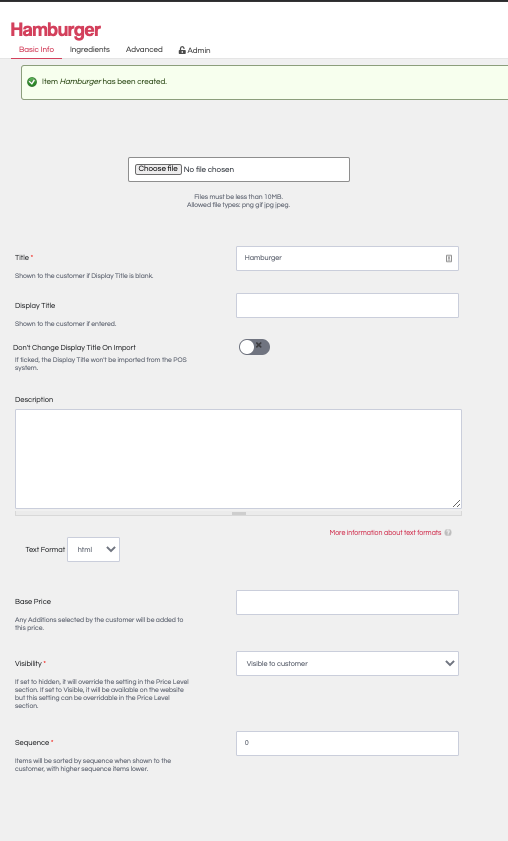
Title : The item name that appears on your Order Manager and docket
Display Title : The name that is displayed to the customer when browsing the store
Description : A chance to up-sell and explain to the customer what the item is. This box will auto adjust to single spacing. Please see our guide on using HTML coding to improve the visual appeal of your menu.
Base Price : The price of the item. This can be changed for different menus easier in the Menu Editor
Visibility : You can set this to be hidden if needed. This is also easier to do in the Menu Editor
Sequence : The order in which your items display on your menu (left to right). 0 = first (we recommend using sequencing of 5 or 10 to allow for easier management in the future)
Ingredients (Additions/Subtractions)

Additions : Select from list of created ingredients and active them if they are relevant to the item.
Subtractions : Let customers know they can only remove certain ingredients and have an understanding of their options with the item. This will prevent them from making unachievable requests before they reach the checkout and use the Special Instructions.
Options : Apply your created Options here and set them Minimum and Maximum quantities. When needed, this will prevent the customer from adding that item to the basket before they've made those options. E.g. Cooking Degree on a Steak or Choosing at least 2 sides for their meal.
Advanced
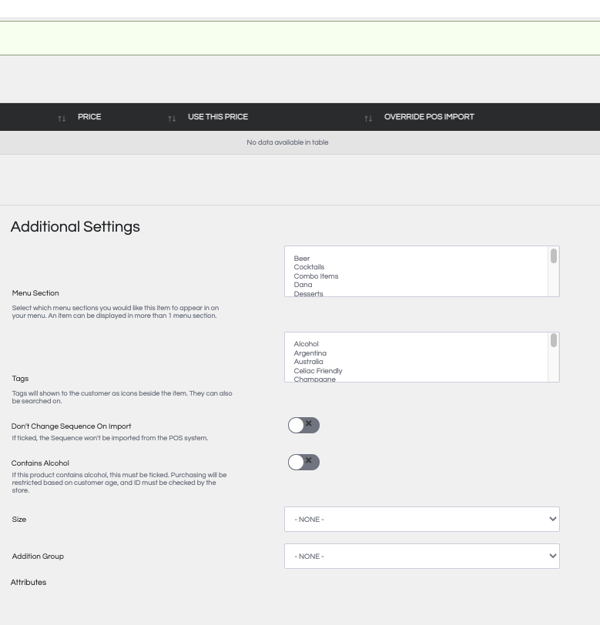
Menu Section: Reassign the item it's menu section. Keep in mind that for the item to appear on your online store, it must be assigned a menu section.
Tags : Add colourful tags to your item to allow customers to navigate their dietary/allergy requirements with ease. To select more than 1 tag at a time, please hold down CTRL + Click or COMMAND + Click when selecting them.
Don't change sequence on Import : This is specifically for POS customers using Doshii or OrderMate. Toggle this to not bring across the items Sequence number when you run an Import.
Contains Alcohol : This is very important for any products containing alcohol. If the customer orders an item with this toggled, it will request them to confirm their date of birth on checkout. You MUST toggle this on for your alcoholic items.
Size : Set the size for this item if it is available in different sizes. If it isn't, leave this as -NONE-
Addition Group : Attach your created Addition group here. Check out our guide on how to utilise Addition Groups here.
Want to learn more or have feedback for us? Say hello!
💬 CHAT: Chat with us online! You can find our ChatBox, 'Dave' in the bottom right-hand corner of our website.
📞 PHONE: AU +61 3 7036 0754 / NZ +64 4 831 9400
🗒️ Form Submission: https://help.hungryhungry.com/kb-tickets/new
✉️ EMAIL: help@hungryhungry.com